Table of Contents
Microsoft Project Add-In Utility
IPM Utilities is a set of tools created to streamline interactions between certain IPM procedures and the Microsoft Project schedule. Other useful features are included as well and are grouped separately in the 'Other Utilities' section; these are not directly involved with IPM.
1. Installation and Compatibility
The IPM Utilities are installed for all users on a computer, and the installation will require administrative privileges. The download information for the most recent version can be found below.
- Version 20.3.9 - Released September 28, 2023
- Use Serial Number 33d5-a6ed to activate the software after launching it for the first time
- Only compatible with MS Project 2010 or higher.

2. Activation
The IPM Utilities software is free but must be activated after a thirty-day trial period. This means users need to register the software with the free serial number 33d5-a6ed.

- Online Activation - Activate Now
- This option requires users to enter their name, company, email address, and serial number. Use the serial number 33d5-a6ed.
- Offline Activation - Step 1
- Obtain via Internet
- Choosing this option will ask users for the same information as the online activation but open a web browser with an activation key that can be used in Step 2.
- Obtain via Telephone or Email
- Choosing this option opens a new window displaying a users Unique ID. Provide this to OPDEC support either by calling the phone number shown or clicking on the “Send Email” button. This button will generate an email for OPDEC support, but it must be sent by the user.
- Offline Activation - Step 2
- Enter the activation key obtained in Step 1 and click the “Enter” button.
- Activate Later
- Users may select this option to continue the free trial and access the utilities. If the Number of Days Remaining displays “0” then the free trial has expired, and users must activate the software to continue.
3. IPM Settings
 This form is responsible for storing the field settings for the IPM Utilities. The Settings Profile Tag text box at the top of the form is used to maintain the settings between multiple Project files. Entering in a unique, identifying tag for the settings entered will tag that Project file with that profile, and in the future will load the corresponding settings. This makes transitioning between multiple Project files seamless once they have been tagged with different settings profiles. The text entered must be 255 characters or less.
The Settings form requires the user to select several fields from their Project file through the drop-down boxes provided in the Field Settings section. Each field select should correlate with its description. These options should correspond to what has already been assigned in IPM, allowing the automated processes to interact with the schedule appropriately.
If these settings are not updated or not correct, then users may experience errors while operating the utilities.
4. Import Status
This process uses a Microsoft Excel file exported from IPM to update the status of designated tasks in the Microsoft Project schedule. To accomplish this, follow these steps:

- Open the MS Project file that was posted to IPM for statusing.
- Select the “Import Status” button from the OPDEC tab
- Check the 'Set Phys % Complete = CAM % Complete' option if desired.
- This option also applies to the custom CAM completion percentage as the physical completion percentage. Doing so allows Microsoft Project to display task completion progress in the Gantt Chart view.
- By default, the “Override Critical Issues” checkbox is unchecked.
- This option allows the user to ignore critical issues found during the import and force the updates to proceed. It's advised to only check this box when the user has already reviewed the critical issues identified on a previous results report. There are however, three critical issues that no matter what option is checked, cannot be updated via the import: UIDs that no longer exist, Tasks that are now inactive, and Tasks that are now summaries. For more detail, reference the Critical Issues subsection of the Import Status Results Report documentation below.
- Press the “Import Status” button
- Select the Excel file that was exported from IPM in the file dialog prompt.
- The process checks to ensure a valid file was selected.
- The process checks for any critical issues in the status import file. Please see the Results Report section below for more detail on these issues.
- The import process will update the tasks as follows:
- Forecast starts are given a “Start No Earlier Than” constraint date equal to the forecast start date requested
- Forecast finishes are updated by changing the duration of the task
- Actual start dates are updated as requested or as originally provided from the IMS to the status instance
- Actual finish dates are updated as requested and the Constraint Type is removed
- The CAM %C field is updated as requested or as originally provided from the IMS to the status instance
- If requested, the physical %C is set to the CAM %C being imported
- The process reviews the schedule after importing the status updates. If any differences are found between the status update and the state of the schedule afterwards, they are highlighted in the Results Report. Please see the Results Report section below for more detail.
- The process completes. If status updates were applied, the user is notified that the process completed and that they should review the results report for any issues that occurred as a result of the status update. If critical issues were found and the “Override Critical Issues” checkbox was not checked, the user sees a notification telling them that no status updates were applied, and that critical issues were found in the results report.
4.1 Import Status Results Report
After each status import, a results report is generated. It is saved in the same directory as the status import file. This report has three sections: the status updates from the import file, the state of the IMS after the status updates are applied, and any critical issues found during the status update.
4.1.1 Status Updates From IPM

This first section of the results report provides the original data contained in the Status file exported from IPM.
4.1.2 IMS Result After IPM Status Updates

This second section shows the state of the IMS after the status updates from IPM were applied, highlighting deviations between what was requested versus the final result. This allows you to quickly see any deviations in what was requested to what the final result is. Note that this section will remain blank if critical issues were found, and the “Override Critical Issues” checkbox on the Import Status form is unchecked.
Cells highlighted in red indicate a difference between the value listed for a field in the Excel import file and the corresponding value in the IMS. When Actual Dates are highlighted in red, it typically indicates the task in the IMS is split.
The “Out of Sequence ID” column will list the Task IDs of any Out of Sequence predecessors that the current task has a relationship to. A task's predecessor is considered out of sequence by comparing the Actual Start and Actual Finish of the predecessor and current task based upon the relationship type (i.e. FS, FF, etc.). While out of sequence tasks do not necessarily indicate a problem, this and any other red indicated cells should be reviewed, understood, and resolved, if necessary, before continuing with further analysis.
4.1.3 Critical Issues

The third and final section reports any critical issues that were found before performing the status updates. By default, if any critical issues are found (with the exception of “Split Tasks Identified”), the process will not apply any status updates. If the user wants to bypass these critical issues and proceed with the status updates, checking the “Override Critical Issues” checkbox on the import form would be necessary.
No matter the “Override Critical Issues” option chosen, the import process will never update tasks that exhibit any of the following three critical issues.
- UID Not Found
- The task UID in the import file is no longer in your current schedule.
- Task is now Inactive
- The task is now inactive in the current schedule and cannot receive status (its “Active” field value is set to “No”).
- Task is now a Summary
- The task is now a summary in the current schedule and cannot receive status (its “Summary” field value is set to “Yes”).
These checks below help illuminate conditions where the IMS data has changed since being shown to the users in IPM for statusing. The term 'expected values' refers to IPM's last known “Actual Start” and “CAM % Complete” as they were provided from the IMS to IPM. These expected values are in the “IMS Info as Provided to IPM” section of the Results Report. Note that these issues are only applicable to IPM Status exports generated with IPM version 9.3.94 or later.
- Starting CAM %C
- The task's current CAM % Complete value does not match the expected value.
- Actual Start
- The task's current Actual Start value is either missing or different from the expected value.
- Forecast Start
- The task has a Forecast Start provided in the Status file, but already has an Actual Start assigned in the current schedule.
- Actual Finish
- The task's current Actual Finish value is either missing or different from the expected value.
- Split Task Identified
- The check is performed for each task after its status is updated. If the status update caused the task to split, this error will be shown.
5. Export Status
This utility exports the current status of the Microsoft Project file to a predetermined format that can then be imported into the cost system. The typical process is dictated below:
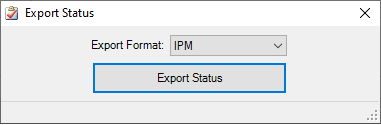 Ensure the correct Settings are applied and then select the “Export Status” button from the OPDEC tab
- Choose from the Export Format drop-down depending on which Cost System is being utilized by the program: Deltek's MPM or IPM's Internal Cost Module.
- Press the Export Status button
- The tool will update users on the export process using the status bar on the dialog
- When the process completes, the resulting “.csv” file(s) will be in the same folder as the MS Project file provided, unless the “Use Custom Location for Export Files” setting is checked in the current IPM Settings profile. These files must then be handed off to finance for import into the cost system.

Please note only tasks with the following criteria are exported for status:
- Tasks must be Active in Project
- Tasks must have a Package ID
- Tasks must have a valid Earned Value Technique or Milestone ID.
- Note that tasks with an 'AE' or 'BE' Earned Value Technique are not considered valid for status exports.
5.1 Errors
The export process first validates the schedule data to ensure it can be transferred to the destination cost system without issues. Below is a listing and explanation of these errors.
- IPM Format
- The assigned earned value technique of '@@@' is invalid
- The value in the EVT field (specified in settings) did not match any expected EVT values. These are PP, 0/100, 25/75, 40/60, 50/50, PC, LOE, MW, BE, AE, and MWPC. AE (Apportioned Effort) and BE (BCWP Entry) values will not trigger this error, but they will also not be exported.
- Summary's Actual Finish doesn't match latest Actual Finish of its detail
- The summary task's dates should align with the latest Finish date of its detail. If the summary is a MWPC task, please ensure that all of its children are identified appropriately with Milestone ID's and Milestone Weights. This check is primarily for catching milestone summaries that include detail tasks not part of the milestone (e.g. a summary task with 'MWPC' EVT, and six detail tasks. Four of the detail tasks are labelled as MWPC with the appropriate Milestone ID/Weight, and two are not. The two that are not could throw off the summary's actual finish calculation.).
- A 'MW' or 'MWPC' EVT assigned to a non-summary task
- Non-numeric value in CAM % Complete field
- Cost Contract Code field didn't contain a value.
- This can only occur if a cost contract code is provided field in the settings. It may be looking at the wrong field or needs to be set to 'Not Applicable'.
- CAM % Complete is > 0 but no Actual Start given
- A task with a CAM Percent Complete value greater than zero must also have an actual start date.
- Actual Finish given with CAM % Complete < 100.
- A task must have a CAM Percent Complete value of 100 if it has an Actual Finish date.
- CAM % Complete = 100 but no Actual Finish given.
- The task has a forecast Start date prior to the Status Date.
- The task has a forecast Finish date prior to the Status Date.
- The task has an Actual Start date beyond the Status Date.
- The task has an Actual Finish date beyond the Status Date.
- Duplicate EV packages encountered
- This error occurs if there is more than one task having the same Package ID with an EVT assigned. Either the Package ID should be changed, or there should onlyi be on task within that Package ID with an EVT.
- Milestone with no Milestone Weight assigned
- Check the field identified in the settings as the Milestone Weight field.
- Milestone with no Work Package ID assigned
- Check the field identified in the settings as the Work Package ID field. The Task UID in question did not have a value in that field.
- Milestone's Work Package ID doesn't match its summary's
- This is a detail level task with a value in its Work Package field that doesn't match the value on its summary (parent) task.
- Milestone cannot have an Actual Finish if parent doesn't have Actual Start
- A detail task cannot finish before its summary starts.
- Milestone cannot have an Actual Finish before its parent's Actual Start date.
- A detail task's start/finish dates must align with its summary. Cannot finish after its summary finishes.
- Milestone cannot have an Actual Finish later than its parent's Actual Finish.
- A detail task's start/finish dates must align with its summary. Cannot finish after its summary finishes.
- Milestone doesn't have an Actual Finish while its parent does.
- Milestone forecasted to finish before its parent's Start date.
- Milestone forecasted to finish after its parent's Finish date.
- Milestone not summarized by a task with EVT of MW or MWPC.
- This is a detail task with a Milestone ID value, but whose summary does not have an EVT value of 'MW' or 'MWPC'.
- MPM Format
- Work Package @@ on Task ID [###] is missing a hyphen to delineate the Milestone ID.
- IPM updates non-weighted EVTs within MPM using its milestones. The Milestone ID that it updates is the portion of the Work Package text after the hyphen (-).
- Task ID [###] has an empty cost contract code field.
- Check the field identified as the Cost Contract Code field in the IPM Settings. This field must have a value or needs to be set to 'Not Applicable' in the settings.
- Task ID [###] has an CAM %C > 0 but no Actual Start date.
- The task must actually start before it earns any CAM Percent Complete.
- Task ID [###] has an Actual Finish yet CAM %C is not 100.
- The task must have a CAM Percent Complete value of 100 if it has an Actual Finish date.
- Task ID [###] has an CAM %C of 100 but no Actual Finish date.
- The task has a forecast Start date prior to the Status Date.
- The task has a forecast Finish date prior to the Status Date.
- The task has an Actual Start date beyond the Status Date.
- The task has an Actual Finish date beyond the Status Date.
6. Export BCR

This utility is responsible for carrying BCR changes from Microsoft Project over to IPM. It accomplishes this by exporting all of the necessary information from each activity that is marked with a BCR number in the 'BCR #' field identified in the settings. The export is created in a comma-separated values text file (.csv) in the same folder location as the Project file, unless you checked the “Use Custom Location for Export Files” option in your IPM Settings profile. This file can then be uploaded into IPM.
Before the utility will allow the creation of the export file for IPM, it will first verify the integrity of the changes being made. The validation process will check for several things, but some checks are given a lower priority than others. These low priority checks will be listed as Warnings, while the urgent checks will be listed as Errors. Please see below to determine the criteria for any errors or warnings that may be received. Note that inactive tasks are not subjected to these logic tests, but they may still be exported if the BCR field values correspond.
6.1 Errors
- Task has EVT but no Package defined
- All exported tasks with an Earned Value Technique must also have a Package assigned.
- Invalid Baseline Start
- The activity's Baseline Start field is not recognized as a date.
- Invalid Baseline Finish
- The activity's Baseline Finish field is not recognized as a date.
- Baseline Start must be prior to Baseline Finish
- The activity's Baseline Start date is listed as being later than its Baseline Finish
- Invalid Baseline Duration
- The activity's Baseline Duration field is not recognized as a number.
- Activity with an unknown, invalid EVT
- An EVT was encountered that does not match those that are accepted by IPM. Any value in the EVT field must conform to one of the following eleven values: 0/100, 25/75, 40/60, 50/50, PP, PC, LOE, MW, MWPC, BE, or AE.
- Package ID does not have an EVT assigned
- This error reports any BCR affected packages that are missing an EVT. If the reported activity is part of a summary package, be sure the summary package has the same BCR number assigned.
- Package ID found multiple times with an EVT assigned
- This error reports any BCR affected packages that have more than one EVT assigned.
- Package ID has duplicate Milestone IDs assigned
- This error reports any BCR affected packages that have duplicated Milestone IDs. Milestone IDs must be unique among Work Packages. Two tasks in the schedule cannot have the same Work Package value and the same Milestone ID value.
- Package ID cannot have spaces, commas, or apostrophes
- This error reports any tasks associated with a Package ID containing any of the listed invalid characters.
- Task has a baseline duration without a Package or Exemption defined
- The activity's Baseline Duration is not equal to 0, it is not a summary, and both the Package ID and Exemption fields are blank.
- Closed Task with no Actual Start, Actual Finish, or CAM %C < 100
- Closed activities must be shown as being complete
- Task is assigned a Milestone ID without a Milestone Weight
- Milestone tasks (those summarized by a parent 'MW' or 'MWPC' EVT) need both a Milestone ID and Milestone Weight value to be properly assessed by IPM.
- Task is assigned a Milestone Weight without a Milestone ID
- Milestone tasks (those summarized by a parent 'MW' or 'MWPC' EVT) need both a Milestone ID and Milestone Weight value to be properly assessed by IPM.
- Milestone Weight value cannot exceed 16 digits and 4 decimal places
- The milestone weight cannot be longer than 16 digits total (including digits after the decimal), and cannot have more than 4 digits after the decimal point.
- Activity must have an EVT of 'AE' if Base WBS provided
- The Base WBS field is used only on Apportioned Effort EVT activities
- Activity with 'AE' EVT must have a value in the Base WBS field
- Apportioned Effort activities gain performance based on the Base WBS they are apportioned to
- Activity with 'AE' EVT must have a Base WBS field assigned in the settings
- Apportioned Effort activities must have a Base WBS assigned, so the setting identifying this field must be set
- Base WBS on 'AE' EVTs cannot be itself
- The Package ID cannot be equal to the Base WBS for a task with an 'AE' EVT
- Task cannot have both an EVT and Milestone ID/Weight
- Detail Package ID must match its summary Package ID
- The activity is part of the detail for a summary task tagged with the BCR number, the summary task has an EVT, and the detail task has no Package ID or a Package ID that does not match its summary's.
- Detail Control Account must match its summary Control Account
- The activity is part of the detail for a summary task tagged with the BCR number, the summary has an EVT, and the detail activity has either no Control Account or a Control Account that does not match its summary's.
- Detail BCR # must match its summary BCR #
- The activity is part of the detail for a summary task tagged with the BCR number, the summary has an EVT, and the detail activity has either no BCR # or a BCR # that does not match its summary's.
- Detail activities of a milestone summary cannot be milestones
- The activity is a detail activity of a summary within a summary. The first summary level has an EVT of 'MW' or 'MWPC'. The summary within that summary is listed as a milestone. This activity is part of the detail for the second level summary, and it is also defined as a milestone with an ID and Weight provided.
- Detail tasks of a summary with a BCR # cannot be inactive.
- The activity is a detail activity within a summary that is assigned a BCR #. All detail tasks of summary must be active.
- Milestone not summarized by a task with EVT of MW or MWPC
- This is a detail task with a Milestone ID or Weight value, but whose summary does not have an EVT value of 'MW' or 'MWPC'
- Weighted EVT Package has no milestones defined
- The activity is a summary with an EVT of 'MW' or 'MWPC', and it has no detail activities defined as milestones.
- Summary's Baseline Start date must align with its detail activities.
- Any exported summaries must have their Baseline Start date align with the earliest Baseline Start date of its detail. The summary cannot be baselined to Start earlier than the tasks it summarizes.
- Summary's Baseline Finish date must align with its detail activities.
- Any exported summaries must have their Baseline Finish date align with the latest Baseline Finish date of its detail. The summary cannot be baselined to Finish later than the tasks it summarizes.
- MW and MWPC EVTs must be summaries
- These earned value techniques require earned value milestones to be identified within the schedule. This is done by using a summary activity as the work package and sub-activities as the milestones. If milestones are not requested or required within the schedule, the EVT needs to be reevaluated,
- Activity does not have a Control Account assigned
- Every activity identified as part of the BCR # to export needs to have a Control Account value populated. Check the IPM Settings to ensure the Control Account field is correctly established.
- EVT cannot be identified at both the summary and detail level
- This error reports any task that is assigned an EVT while already summarized by a parent task with an EVT. The error reports both the summary and detail tasks associated with the issue.
6.2 Warnings
- Activity name is duplicated within this BCR #
- Activity has an EVT provided, and its Task Name is not unique among the other activities tagged with the same BCR #. This seems like it could be indicative of a problem.
- Milestone ID does not equal activity UID
- This is a common convention that we recommend users follow, but it is not required.
7. Export IPMDAR
This utility provides a system to export schedule data into a valid IPMDAR deliverable known as the IPMDAR Schedule Performance Dataset. This is accomplished by inputting Contractor Information and using custom fields within the Project to provide the information required by the dataset. The combination of inputs and Project field mappings is called a Settings Profile in the tool. Once the first profile is established, the tool can automatically export schedule data into the strictly formatted JSON text files, which are then zipped into a final deliverable file.
7.1 Getting Started
Before beginning, gather the required data and ensure the schedule is updated to provide all the applicable information that's requested by the IPMDAR.
7.1.1 Prerequisite Data
- Contract/Contractor Information. This includes identifying information about the contract, the contract's security level, program, and point of contact for this report. See the 'Contractor Info' tab of the Settings form for a complete list.
- Associated Task Data. The schedule will need to use custom task fields to identify the Task Subtype, Planning Level, and other data such as the corresponding Control Account, Earned Value Technique, Work Package ID, etc. See the 'Core Field Mappings' tab of the Settings form for a complete list.
- Any other custom Project/Task information that could be useful. Additional information, although not specifically requested, may be provided through the Custom Project Fields and Custom Task Fields tabs of the Settings form. This is up to the user's discretion to decide what other data in the schedule could supplement the submission.
- The schedule must meet the following criteria for the tool to run:
- Must not have subprojects
- Must have a valid Status Date
- Must have a Project Start Date
- Must have a Project Finish Date
- Also, note that Inactive tasks are automatically excluded from the export. However, the tool reports active task logic as it is shown in MS Project. If active tasks are logically linked to inactive tasks, these links should be removed before exporting to avoid mentioning logic links to nonexistent tasks.
7.1.2 Settings
To get started, launch the tool from the ribbon button. Next, click on Tools → Settings to open the IPMDAR Settings window.

- Contractor Info: Fill out all applicable fields with the appropriate Contract, Program, Disclosure, Contractor, Point of Contact, and EVMS information. Please note the following while doing so:
- A Security Marking designation must be provided in the Disclosure section.
- If a Contractor ID Code Type is provided, a corresponding ID Code must also be provided.
- If EVMS is accepted on your program, the date of EVMS acceptance must also be provided.

- Custom Project Fields: This tab is optional. If there is other relevant information in the schedule that should be provided, enter that data here. There are up to ten fields available. The Field Name describes the data, the Field Value is the data itself, and the Field Comments provide additional elaboration if needed. Please note that any field names require field values and vice versa.

- Custom Task Fields: This tab is optional. If there is custom information associated with each task, enter that data here. There are up to ten field inputs available. The specified field will be exported for each task in the schedule. Please note that any field names require field values and vice versa. If the selected Project field is a Lookup field, the “Use Lookup Desc” checkbox will become enabled. Use this option to use the Lookup field's description as its value instead of the field's item.

- Core Field Mappings: Map each dropdown box to its applicable Project field. The Task Subtype, Task Planning Level, and On Critical Path settings are the only settings required to run the tool, although others should be given if available/applicable. The dropdowns will allow inputs from custom Text, Number, Outline Code, and Flag fields. If the selected Project field is a Lookup field, the “Use Lookup Desc” checkbox will become enabled. Checking this box will use the Lookup field's description as its export value instead of the field's item.
- Note that there is an additional field, Task Type, exported as well. The tool automatically sets the task's Type. See the possible task types and their corresponding criteria below.
- Task Types
- SUMMARY - Summary field equals 'Yes'.
- MILESTONE - Milestone field equals 'Yes'.
- HAMMOCK - Task has no predecessors, and also has linked fields.
- ACTIVITY - All tasks not meeting any of the other above criteria.
- Note that the Earned Value Technique is translated from IPM's required value into the IPMDAR's required value. See how each IPM EVT value maps to the corresponding IPMDAR EVT value below ([IPM EVT] = [IPMDAR EVT]).
- 25/75 = FIXED_X_Y
- 40/60 = FIXED_X_Y
- 50/50 = FIXED_X_Y
- 0/100 = FIXED_0_100
- PC = PERCENT_COMPLETE
- LOE = LEVEL_OF_EFFORT
- AE = APPORTIONED_EFFORT
- MW & MWPC = MILESTONE - Consider using a Custom Task Field to provide Milestone Weights.
- BE = OTHER_DISCRETE - The additional IPMDAR field, “Other Earned Value Technique” is populated with “BCWP Entry”)
- No IPM earned value techniques will be translated to “Standards” or “Units”, which are techniques also accepted by the IPMDAR.
- Note that due to the end points of the Critical and/or Driving path(s) being dependent on contract requirements, and subject to change during the life-cycle the contract, manual identification of the associated activities using a Flag field is required.
7.2 Running the Tool

Once a Settings Profile has been created, the export is ready to run. Simply input a valid Reporting Period End date, choose the duration unit of measure (“Days” or “Hours”), and click “Run Export”. The tool will gather the schedule data, export it to the corresponding JSON files, and then zip (compress) those files into a deliverable result. The exported files will always be saved in the same location as the schedule, unless the “Use Custom Location for Export Files” setting is checked in the IPM Settings profile.
7.3 Solving Issues
If data omissions or logical errors are found, they will be presented in a display grid after the tool is finished analyzing the schedule. Four columns of information about the issues are provided: Count, Issue Severity, Export File, and Issue Description. Note that the “Copy to Clipboard” button will copy the issue grid to the clipboard, allowing the data to be pasted into other applications such as Excel.

- Count - Provides a row number for each issue.
- Issue Severity - Tells the user if an issue is an error (export will not occur) or a warning (export will occur).
- Export File - Tells the user which associated IPMDAR export file is affected by the issue.
- Issue Description - Briefly describes the reason for the issue.
The errors must be resolved for the tool to export a result successfully. Please see below for a list of the possible errors and their resolutions.
7.3.1 Errors
- “Invalid Task Subtype - Value must match predetermined list” - The Task Subtype field values must exactly match one of the following. Any other values will be flagged with this error message.
- RISK_MITIGATION_TASK
- SCHEDULE_VISIBILITY_TASK
- SCHEDULE_MARGIN
- CONTRACTUAL_MILESTONE
- “Invalid Task Planning Level - Tasks with type 'ACTIVITY' must have a Planning Level value.” - The Task Planning Level field must be populated for all tasks categorized as activities. This includes all tasks that are not summaries, milestones, or hammock tasks.
- “Invalid Task Planning Level - Value must match predetermined list.” - The Task Planning Level must also match one of the following predefined values accepted by the IPMDAR:
- SUMMARY_LEVEL_PLANNING_PACKAGE
- CONTROL_ACCOUNT
- PLANNING_PACKAGE
- WORK_PACKAGE
- ACTIVITY
- “The required fields (see documentation) must all be provided.” - Each task must have values for the following Project fields. Those missing one of these will be flagged with this error.
- Start
- Finish
- Early Start
- Early Finish
- Late Start
- Late Finish
- “The conditional fields (see documentation) must all be provided or excluded” - Each task must either have values for all of the following fields or not have values for any of the following fields:
- Baseline Duration
- Start Variance
- Finish Variance
- Baseline Start
- Baseline Finish
- “Each Calendar must have at least one associated workshift - See calendar 'Calendar Name'“ - This error indicates that the calendar listed in the message ('Calendar Name') had no work shifts defined, meaning it had no default working times established for working days. A common cause of this is “24 Hour” calendars that have one shift that starts and ends at the same time (typically 12:00 AM). To resolve, use the “Change Working Time” button in Project and set work shifts for each calendar used by a task in the schedule.
7.3.2 Warnings
- “Task Planning Level is 'PLANNING_PACKAGE' with EVT not equal to 'PP'“ - This is a warning meant to indicate a possible misidentification. The tool expects that all tasks labelled as a Planning Package in the Task Planning Level field will also be labelled as such in the Earned Value Technique field.
8. MilestonesPro to PNG
This utility provides the capability to convert images created in the software Milestones Professional from their default file format to the .png image format. This allows the files to be uploaded into IPM while retaining the image resolution.

Begin by using the Browse button next to the “Milestones Pro File Location” setting to select the folder containing the Milestones Professional files. Use the Search button to find all the Milestones Pro files available. If the “Search SubDirectories” checkbox is checked, the process finds all Milestones Professional files in every location within the initially selected folder. Click the “Stop” button to cancel the search.
Once the list displays the found Milestones Professional files, select the ones to export using the “Select” column. The “Select All” check box will deselect/select all files in the list.
Now, use the Browse button at the bottom of the form to select your export location. With the appropriate files still selected, use the Export Selected File(s) button to export them.
9. Import Baseline EV Data
This process uses a Microsoft Excel file exported from IPM to update your Microsoft Project file with earned value data.
 The information being imported to your Project file represents all the EV data that was identified during the IPM baseline process. Work Package ID, Milestone ID, Milestone Weight, EVT, and schedule Exemption information is updated to the schedule to ensure a solid linking connection to the cost data.
NOTE: It is very important that this process is executed if schedule changes are to be uploaded to IPM, overwriting the schedule that is already there. Avoiding this step can cause EV information identified in IPM to be lost.
10. Export Calendars
Clicking on this utility exports your Microsoft Project file's calendar to a “*.CSV” text file that is saved in the same location as the Project file, unless you checked the “Use Custom Location for Export Files” setting in your IPM Settings profile. This text file is then uploaded into IPM to report the non-working days for the schedule.
11. Other Utility Settings

This form is responsible for storing the settings for all of the Other Utilities. These are the general-purpose tools not directly related to IPM.
Multiple settings profiles can be managed using the File options: Create, Save, Rename, and Delete. These profiles are stored on your device, independent of the Microsoft Project file.
The dropdown options should be populated with corresponding custom Project fields. These custom fields are used during the Inspect Schedule Status checks.
- Other Utility Settings
- CAM % Complete: This value is to represent the percent of scope that is estimated to have been completed by the CAM (Control Account Manager). Values should be reported in whole numbers (e.g., 25)
- Empty Text Field: An unused text field is required for the process to flag which tasks triggered which Inspect Schedule checks.
- Empty Date Field: An unused date field is required to perform calculations during the Invalid Baseline Data and Baseline Summary Alignment checks on the Inspect Schedule.
- Major Events: Enter the field that uniquely identifies the major events in the schedule (e.g., PDR, CDR, etc.)
- Earned Value Technique: The text field identifying the EVT of each task.
- Exemptions (DCMA/DECM): The text field identifying any exemption values for the DCMA and DECM checks in the Inspect Schedule tool. The exempt value required is specific to the check to exempt the task from, and it will be either the DCMA 14-point number enclosed with braces or the DECM code enclosed in braces. For instance, to exempt a task from the fifth DCMA check (Hard Constraints), place a value of ”{5}” into the exemptions field. To exempt the DECM version of the Hard Constraints check, insert a value of ”{06A209a}”.
- Other Options
- Restore user filter after Inspect Schedule runs/closes: Indicates whether the Inspect Schedule tool will reapply whatever filter the schedule had in place previously.
- Always Display Navigate Tasks (Restricts direct Project interaction): This option launches the Navigate Tasks form as a permanently focused window. Project cannot be used while the form is open. This enables following networks of predecessors/successors without losing focus on the Navigate Tasks form.
12. Inspect Schedule

This utility contains a series of schedule health checks broken into three categories: DCMA 14-point, DECM, and IPM. The IPM checks are designed to OPDEC's IPM software and its custom requirements, while the 14-point and DECM checks conform to DCMA's requirements.
- Status Date - IPM recommends setting the time of day in your status date to the project's default end time. If it is not, the utility will display a warning sign next to the status date in the upper right corner.
- Use Exemptions - If this setting is checked, exemption field values will be taken into consideration (see Exemption Field in Other Utility Settings). These exemptions will only apply to the DCMA and DECM checks, and the exempted issue count will be displayed in the “Exempt” column of the tool.
Note: Inactive tasks may be flagged as issues if using the Standard edition of Microsoft Project. The 'Active' field is only available in Project Professional, so the tool cannot distinguish between active/inactive tasks while using Project Standard.
12.1 DCMA 14-Point Checks

For convenience, we will refer to two task groups in the documentation. These are Incomplete Tasks and Total Tasks. Some checks deviate from these conventions, and these exceptions will be noted.
Incomplete Tasks: All tasks except those with the attributes below.
- Summaries - The Summary field equals Yes.
- LOE - The earned value technique field (provided by the user in the settings) equals “LOE”. Also, if a summary task is assigned an “LOE” EVT, its detail tasks are considered LOE as well.
- Milestones - The Baseline Duration field equals 0.
- Inactive - The Active field equals No.
- Completed - The Actual Finish field does not equal NA.
Total Tasks: All tasks except those with the attributes below.
- Summaries - The Summary field equals Yes.
- LOE - The earned value technique field (provided by the user in the settings) equals “LOE”. Also, if a summary task is assigned an “LOE” EVT, its detail tasks are considered LOE as well.
- Milestones - The Baseline Duration field equals 0.
- Inactive - The Active field equals No.
Also, note that a result of “NaN” indicates that the denominator of the percentage is equal to 0, and therefore no tasks in the schedule met the criteria defined by one of the two groups above.
Check Details
- Missing Logic
- Description: Identifies incomplete tasks with either no predecessors or no successors.
- Percentage: Missing logic incomplete tasks divided by total incomplete tasks.
- Goal: Less than or equal to 5%.
- Leads
- Description: Identifies task logic links with leads (negative lag) on incomplete tasks. Negative time is not demonstrable and should not be encouraged.
- Percentage: Lead links divided by total number of links within incomplete tasks.
- Goal: Zero.
- Lags
- Description: Identifies task logic links with lags on incomplete tasks.
- Percentage: Lag links divided by total number of links within incomplete tasks.
- Goal: Less than or equal to 5%.
- FS Relationship Types
- Description: Identifies the number of links using the Finish-To-Start relationship on incomplete tasks. These should make up most of links in the schedule.
- Percentage: FS links divided by the total number of links found within incomplete tasks.
- Goal: Greater than or equal to 90% of links.
- Hard Constraints
- Description: Identifies incomplete tasks with hard constraint types: Must Finish On, Must Start On, Start No Later Than, or Finish No Later Than.
- Percentage: Incomplete tasks with hard constraints divided by total incomplete tasks.
- Goal: Less than or equal to 5%.
- High Float
- Description: Identifies incomplete tasks with a Total Slack value greater than 44 days.
- Percentage: Incomplete tasks with high float divided by incomplete tasks.
- Goal: Less than or equal to 5% of incomplete tasks.
- Negative Float
- Description: Identifies incomplete tasks with a negative value for Total Slack.
- Percentage: Tasks with negative float divided by incomplete tasks.
- Goal: Zero.
- High Duration
- Description: Identifies incomplete tasks within the planning period that have a Baseline Duration > 44 days.
- The planning period is defined as 60 working days after the schedule's status date; only tasks with a Baseline Start within this period are considered.
- This check will ignore planning packages (both summaries and their detail tasks).
- Percentage: High duration, incomplete, not planning package tasks divided by incomplete, not planning package tasks within the planning period.
- Goal: Less than or equal to 5%.
- Invalid Dates
- Description: Identifies tasks with a Forecast Start/Finish prior to the Status Date, and tasks with an Actual Start/Finish after the Status Date.
- Percentage: Invalid date tasks divided by total tasks.
- Goal: Zero.
- Missing Resources
- Description: This check is not applicable. IPM does not allow resources in the schedule.
- Percentage: NA
- Goal: NA
- Missed Tasks
- Description: Identifies tasks that were supposed to finish according to their baseline but have not. These tasks have a Baseline Finish less than the Status Date and either a Finish greater than the Baseline Finish or the Actual Finish equals 'NA'.
- Percentage: Missed tasks divided by total tasks with a Baseline Finish date less than or equal to the Status Date.
- Goal: Less than or equal to 5%.
- Critical Path Test
- Description: The goal is to test the integrity of the schedule's network logic, particularly its critical path, using the steps detailed below. Otherwise, the steps below are performed.
- If any negative slack is found in the schedule, the test immediately fails with a notification.
- Note: The Project Option “Calculate multiple critical paths” must be disabled (unchecked) for this check to work properly. To do this, navigate to File → Options → Advanced and uncheck this option at the bottom of the window.
- The major events are released. This means removing any constraints or deadlines on all tasks identified as a major event in your settings.
- Gather the current Project Finish date
- Calculate what adding 600 days to the Project Finish date will be (according to the default schedule calendar)
- Filter the schedule for tasks with Total Slack equal to 0, an Actual Finish equal to NA, and a Summary field value of No.
- Find the task within the filter criteria that has the earliest Start date.
- Increase this task's duration by 600 days.
- Check to see if the Project Finish date is equal to what we gathered in Step #2.
- If it is not, this indicates a problem in the network logic. The entire schedule (without constraints/deadlines) should shift forward when we increase the duration of our incomplete task.
- The process restores all major event constraints/deadlines and resets the duration of our targeted task to its initial value.
- Percentage: The utility will display a Pass or Fail result.
- Goal: NA
- Critical Path Length Index
- Description: The CPLI is a measure of the efficiency required to complete a milestone on time. The completion task is targeted automatically by the utility. The calculation steps are listed below.
- Filter the schedule for all major events (identified in your settings) that meet the following criteria: EVT is not equal to 'LOE', Actual Finish is equal to NA, and Baseline Finish is greater than the Status Date.
- Find the major event among the filtered list with the earliest Forecast Finish. This is our completion task.
- Release the major events. This removes any constraints or deadlines associated with major event tasks.
- Find the Critical Path Length (CPL). This is the number of working days between the Status Date and the unconstrained completion task's Finish date.
- Constrain the completion task to its Baseline Finish date with a Finish No Later Than type.
- Find the completion task's Total Float (TF).
- Restore the major events' constraints and deadlines.
- Percentage: (CPL + TF) / CPL. This metric is left as a ratio instead of a true percentage.
- Goal: Greater than or equal to 0.95
- Baseline Execution Index
- Description: The BEI is a calculation of the efficiency of task accomplishment measuring against the baseline tasks. Listed below are the calculation steps followed:
- Filter out inactive tasks, summaries, LOE tasks, and milestones.
- Filter the resulting tasks down to those with a Baseline Finish less than the first day of the Status Date's month.
- Count and label as Baseline Count
- Clear filters
- Filter out inactive tasks, summaries, LOE tasks, and milestones.
- Filter for tasks with an Actual Finish less than the first day of the Status Date's month.
- Count and label as Actual Count
- Divide the Actual Count by the Baseline Count. This is the BEI.
The BEI is always shown along with the Hit Task Percentage (HTP). The HTP is displayed in the Exempt column of the utility for this check. The calculation steps for the HTP are listed below.
- Filter out inactive tasks, summaries, LOE tasks, and milestones.
- Filter for tasks within this subset having a Baseline Finish less than or equal to the last day of the Status Date's month.
- Count and label these as the Baseline Count
- Add an extra criterion to the existing filter, and filter for tasks having an Actual Finish less than or equal to their Baseline Finish.
- Count and label these as the Actual Count
- The HTP is the Actual Count divided by the Baseline Count.
- Percentage: The BEI and HTP calculations are shown above.
- Goal: Greater than or equal to 0.95
12.2 DECM Checks

The DECM checks in this tool are compatible with DECM version 6.0. The DECM (DCMA EVMS Compliance Metrics) include most of the Artifact 11 checks (categorized as requiring only the IMS) items with a few exceptions. Excluded checks are the ones requiring unavailable EV Percent Complete or BCWP values (“06A505a”, “06A505b”, and “10A302b”), “06A211a” which requires external contractor information, and “06A301a” which requires external supplemental schedules and MRP/ERP system data.
For convenience, when referencing “incomplete tasks” in the descriptions below, we are referring to tasks that meet the following criteria:
- Summary - Summary field equals No.
- Active - Active field equals Yes.
- Incomplete - Actual Finish equals NA.
Also, note that a result of “NaN” indicates that the denominator of the percentage is equal to 0, and therefore no tasks in the schedule met the overarching criteria of the check.
- (06A204b) Dangling Starts or Finishes
- Description: Identifies dangling tasks either without Predecessors, without Successors, with an Open Start, or with an Open Finish.
- Open Start tasks have no FS or SS relationship with any of its predecessors.
- Open Finish tasks have no FS or FF relationship to any of its successors.
- This check will not flag tasks that are LOE, finished, un-baselined (missing Baseline Start/Finish), and the beginning/ending tasks of the schedule (identified as those with earliest Baseline Start or latest Baseline Finish).
- Additionally, milestones, defined as tasks with zero duration, are only flagged if they do not have predecessors or successors.
- The EVT field (identified in your Other Utility Settings) is used to determine what tasks are LOE.
- Percentage: Dangling tasks divided by incomplete, non-LOE tasks
- Goal: Zero.
- (06A205a) Use of Lags
- Description: Identifies tasks with logic links that include lag.
- Percentage: Lag tasks divided by incomplete tasks.
- Goal: Less than or equal to 10%.
- (06A208a) Summary with Logic
- Description: Identifies summary tasks that have either predecessors or successors.
- Percentage: Not applicable. This check only returns the count of issues found.
- Goal: Zero.
- (06A209a) Use of Hard Constraints
- Description: Identifies incomplete tasks that utilize one of the following constraint types: Start No Later Than, Finish No Later Than, Must Start On, or Must Finish On.
- Percentage: Incomplete tasks with hard constraints divided by incomplete tasks.
- Goal: Zero.
- (06A210a) LOE Tasks with Non-LOE Successor
- Description: Identifies any LOE tasks (including summaries) with a non-LOE successor. We define non-LOE as any task without a value of 'LOE' in the EVT field (including blanks). The EVT field is identified in the Other Utility Settings. See the EVT entry in the Glossary section of this documentation for a list of acceptable values.
- Percentage: LOE tasks with non-LOE successors divided by total number of LOE tasks.
- Goal: Zero.
- Note: While LOE activities that have an end-of-project milestone as a successor are acceptable, the process does not automatically assume what the end-of-project milestone(s) are. For this reason, it may be necessary to validate/confirm issues reported as false-positives.
- (06A212a) Out of Sequence
- Description: Identifies tasks that are out of sequence. Here are some noteworthy details of the check criteria:
- Time of day is considered when comparing dates.
- Leads and lags are also considered when comparing dates.
- Summary tasks and inactive tasks are avoided.
- Percentage: Not applicable. This check only returns the count of issues found.
- Goal: Zero
- (06A501a) Missing Baseline Start or Finish Dates
- Description: Identifies tasks that do not have a Baseline Start or a Baseline Finish.
- Percentage: Missing baseline date tasks divided by total tasks.
- Goal: Less than or equal to 5%.
- (06A504a) Prior Month Actual Start Change
- Description: Identifies tasks who’s Actual Start date has changed from the previous month's IMS to the current month's IMS. The user must provide the file location of the previous IMS they would like to check their current file against. Ignores only summary tasks and inactive tasks.
- Percentage: Tasks with an Actual Start date change divided by the total number of tasks in the previous IMS with an Actual Start date.
- Goal: Less than or equal to 10%.
- (06A504b) Prior Month Actual Finish Change
- Description: Identifies tasks whose Actual Finish date has changed from the previous month's IMS to the current month's IMS. The user must provide the file location of the previous IMS they would like to check their current file against. Ignores only summary tasks and inactive tasks.
- Percentage: Tasks with an Actual Finish date change divided by the total number of tasks in the previous IMS with an Actual Finish date.
- Goal: Less than or equal to 10%.
- (06A506a) Invalid Actual Start and Finish
- Description: Identifies tasks with an Actual Start or Actual Finish greater than the status date.
- Percentage: Number of invalid AS/AF tasks divided by total tasks with an Actual Start date.
- Goal: Less than or equal to 5%.
- (06A506b) Invalid Forecast Start and Finish
- Description: Identifies tasks with a Forecast Start date less than the Status Date without an Actual Start, and tasks with a Forecast Finish date less than the Status Date without an Actual Finish.
- Percentage: Invalid Start/Finish tasks divided by incomplete tasks.
- Goal: Zero.
- (06A506c) Forecast Dates Riding the Status Date
- Description: Compares the prior month's IMS to the current month and identifies tasks that move in constant proportion to the status date. The calculation steps are below.
- Identify all tasks, excluding summaries, in the current schedule with no Actual Start date and a Forecast Start date within three days after the Status Date.
- For each of these tasks, check their Forecast Start date in the Prior Month schedule. Count all tasks within three days of the prior schedule's Status Date.
- Identify all tasks, excluding summaries and inactive tasks, in the current schedule with an Actual Start date and without an Actual Finish date.
- Identify all tasks, excluding summaries and inactive tasks, in the prior month schedule with Actual Start dates.
- Check for any matching tasks between these two sets. For those that do, if their Remaining Duration is +/- 2 working days then these are flagged and counted as well.
- The issue count will be a unique combination of both sets of identified tasks.
- Percentage: All flagged tasks divided by incomplete tasks.
- Goal: Less than or equal to 1%.
- (10A303a) Do all PPs have Duration?
- Description: Identifies planning package tasks with a Baseline Duration less than or equal to one day. Planning packages are required to have a value of 'PP' in their EVT field (defined in your settings).
- Percentage: PP tasks with a Baseline Duration less than or equal to one day divided by total PP tasks.
- Goal: Less than or equal to 10%.
12.3 OPDEC Checks

- Out of Sequence Tasks
- This check is very similar to the DECM version. The only difference between the IPM and DECM versions is that the IPM version will look at all completed tasks.
- Tasks Needing Status
- This check identifies tasks that require an updated status.
- Other Criteria: The task is not a summary, has a Start/Finish prior to the status date, and does not have valid actual start/finish.
- Invalid CAM % Complete
- This check identifies any tasks whose CAM percent complete field is not in alignment with its actual start/finish.
- Invalid Baseline Data
- This checks for problematic data with Baseline fields: Baseline Start, Baseline Finish, and Baseline Duration. Since MS Project will accept ANY values as baseline start/finish/duration, this check not only ensures the finish date is after the start but also confirms that only date/number values are given (no symbols, question marks, blanks, etc.).
- Baseline Summary Alignment
- This check identifies summary tasks whose detail tasks have either an earlier Baseline Start date or a later Baseline Finish date. The summaries themselves are flagged as issues.
- Split Tasks
- This check identifies split tasks. These are tasks with an intermittent schedule; they stop/start work one or several times in their duration. Split tasks may cause problems when assigning Actual Start/Finish dates and can negatively affect schedule health.
- Effort Driven
- This check identifies any task marked as Effort Driven.
- Other Criteria: The task is effort driven.
- Unknown EVT
- This check identifies any values in the EVT field that are not accepted by IPM. Any value in the EVT field must conform to one of the following eleven values: 0/100, 25/75, 40/60, 50/50, PP, PC, LOE, MW, MWPC, BE, or AE.
- Constraint on Completed Tasks
- This check identifies any completed tasks that have a constraint applied.
- Other Criteria: The task is not complete, has a constraint date, and is not a summary.
- Constraint on Summary Tasks
- This check identifies any summary tasks that have a constraint applied.
- Consecutive Constraints
- This check identifies any tasks with constraints (Constraint Type is not “As Soon As Possible”) whose successors also have constraints.
- SNET within 1WK of Pred Finish
- This check identifies tasks with Start No Earlier Than constraint dates that are within 5 working days of its predecessor's finish date. These constraints can be unnecessarily causing gaps in the schedule, but they are not always a problem.
- SNET Not Pushing
- This check identifies tasks with a “Start No Earlier Than” constraint whose predecessors are pushing the Start date of the task past the constraint date. These constraints do not affect the schedule.
- ? Durations
- This check identifies any tasks with a question mark in its duration.
- Non-Fixed Duration Types
- This check identifies any tasks that do not have a fixed duration type.
- Elapsed Durations
- This check identifies any tasks that have an elapsed duration (an “e” in the duration field)
- Other Criteria: The task has not finished.
- Non-Day Duration Types
- This check identifies any tasks that have a duration specified in a different unit of measure other than days.
- Other Criteria: The task is not a summary, does not use days as a unit of measure, and is not finished.
- Fractional Durations
- This check identifies any tasks with a duration that is not a whole number.
- Other Criteria: The task is not a summary, has not finished, and has a duration that is not a whole number.
- Resources Assigned in Project
- This check identifies any tasks that have been assigned resources.
- Other Criteria: The task contains entries for the Resource Names field.
- Inactive Tasks
- This check identifies any tasks with a value of No in the Active field of Project. Note: This check only applies for Microsoft Project versions 2010 or later
- Manually Scheduled Tasks
- This check identifies any tasks that have been set as manually scheduled instead of automatically scheduled. Note: This check only applies for Microsoft Project versions 2010 or later
- Multiple Calendars
- This check identifies any tasks that are using a calendar that is different from the default calendar as set in Project Information.
- Inconsistent %C Progress
- This check identifies tasks with a MS Project calculated '% Complete' value that does not match the manually calculated, expected value. The manual calculation is as follows: (Time between Actual Start and Status Date / Duration) * 100.
- Planning Package with Actual Start
- This check identifies tasks in the schedule with an EVT of 'PP' and an Actual Start date. Note: This check ignores any tasks with 'CLOSED -' in their task name.
- Empty Tasks
- This check finds all blank task lines in your schedule or 'empty tasks'. These lines are created when pressing the INSERT on the keyboard and no subsequent edits are made to the record. Since these tasks visually appear in the schedule but cannot be filtered on, clicking this check result displays its own error reporting grid that provides the Empty Task IDs, allowing for quick searches. These records can be copied to the clipboard using the button on the error grid display.
- Duplicate Task Names
- This check identifies tasks whose Name value appears more than once in the schedule. All instances of the duplication are flagged as issues. For example, if five tasks all have the same name, the Issue Count of this check will be five.
- Multi-Level EVTs Assigned
- This check identifies any task in your schedule that is assigned an EVT while it is summarized by a parent task that is also assigned an EVT. This check searches through all summary levels in the schedule outline, and reports both the summary and detail tasks associated with the issue.
13. Navigate Tasks
This utility provides the capability to step through each task of predecessor to successor relationship, viewing detailed information about each task along the way.

Upon opening the utility, the currently selected task is displayed in the middle section of the screen. Its predecessors are shown above, and its successors are shown below. Navigate through a relationship by selecting the Predecessor/Successor Task Name link or double clicking anywhere in the row to load the selected task as the current task. Also, a task can be selected in Project to load it as the current task. Selecting the left arrow will navigate back to the previously selected task, while the right arrow will move the selection to back to the most recent position. A task can also be focused by entering the task ID or UID in the boxes at the top of the form and pressing the ENTER key.
All duration fields displayed are converted to day measurement units (as defined by the Hours Per Day setting in Project). Most fields shown in the Navigate Tasks window are self-explanatory; however, there are two that may require further elaboration: Gap and OoS.
The Gap field displays the duration between the relationship end of a predecessor and relationship start of its successor. The Out of Sequence (OoS) field will be filled with a red flag icon if the task's status is illogical. The criteria of the Out of Sequence check can be changed on the Settings form. The “Compare Actual dates on Out of Sequence checks” option toggles whether the OoS and Gap columns will make date comparisons between the Actual Starts/Finishes provided to ensure they are in sequence, or just accept any Actual Start/Finish provided to a predecessor/successor. The result is more precise with the option checked.
14. Milestone Set/Release
This utility consists of two tabs: Set Milestones and Release Milestones.
 The Milestone Field setting indicates which field is set to identify the milestone tasks. This should be an empty text field that only has values (the value itself can be anything) entered for milestone tasks. This process does not use any settings from the Settings form.
Set Milestones
After selecting a constraint date and constraint type, click the Set Milestones button to apply those constraints to all milestone tasks.
Release Milestones
Simply click the Release Milestones button on this tab to set the constraint type of the identified milestone tasks back to 'As Soon As Possible'.
15. Find UID
 Clicking the Find UID button or using the keyboard shortcut (Ctrl+Shift+F) will launch the Find UID utility. This utility will select the task UID provided, and scroll the focus of Project to the task.
16. Initialize Project
Clicking this utility simply applies the “All Tasks” filter to your Project file, opens all outline levels, and scrolls the file's focus to the first task.
17. Help
The Help button will launch this website in your default web browser. For any additional help, please email support@opdec.com
18. About
The About button will display basic information about your version of the installation as well as contact information for questions about the utilities.
19. Check for Update
 The Download Update button will display a form that compares your installed version of the IPM Utilities to the version that is currently available for download. If there is a more recent version of the IPM Utilities available, the form will enable the option to download it. If not, the download button will be disabled.
Additionally, the automatic reminders about updates can be enabled/disabled through this form by toggling the check box on or off.
20. Version History
- 20.3.9 (8/8/2023)
- General
- Updated the format of error display grids to standardize their appearance across multiple forms: Export BCR, Export Status, Export IPMDAR, and Inspect Schedule.
- Navigate Tasks
- Resolved error when opening the utility with no task selected.
- Inspect Schedule
- Renamed the “IPM” check category to “OPDEC”.
- Improved the Empty Tasks check's performance.
- Added new Check: “Multi-Level EVTs Assigned”.
- Export Status
- Updated the Task UID column to be a hyperlink.
- Added a new error: Duplicate EV packages encountered.
- Export BCR
- Removed warning: “Package ID not in [Control Account]-[UID] format”.
- Removed error: “Summary has EVT but no Control Account defined”.
- Added new error: “Package ID cannot have spaces, commas, or apostrophes.”
- Added new error: “Milestone not summarized by a task with EVT of MW or MWPC.”
- Added new error: “EVT cannot be identified at both the summary and detail level.”
- The error grid will now report the specific tasks associated with Package ID errors, instead of listing a “-1” value in the Task ID and UID columns. The errors below are affected by the enhancement.
- Package ID does not have an EVT assigned.
- Package ID has multiple EVTs assigned.
- Package ID has duplicated Milestone IDs assigned.
- Package ID cannot have spaces, commas, or apostrophes.
- Improved the performance of the “Validate BCR” routine when analyzing large summaries.
- 20.3.8 (5/26/2023)
- Inspect Schedule
- Added new check: Duplicate Task Names.
- Added new check: Empty Tasks.
- The result list will no longer filter the Project file for issues with a Count of 0.
- Fixed issue with the High Duration DCMA 14-Point check. It will no longer flag all tasks within the 60-day planning period.
- Project's “Enable/Disable Macros” dialog will no longer be displayed when opening the Prior schedule during DECM checks.
- Export BCR
- Added new error: “Activity does not have a Control Account assigned”.
- The export now accommodates empty task lines within a Summary task marked with the target BCR #. These will be ignored.
- Export Status
- The “Export Complete!” message will no longer be shown if no data was found to export. Instead, the tool will notify the user that no status data was found.
- All Exports
- The “Use Custom Save Location” setting will now detect if an invalid path was provided when the user selects a save location.
- All Error Grids
- Added a “Copy to Clipboard” button to error display grids in the following utilities: Export BCR, Export Status, Export IPMDAR, and in the Inspect Schedule 'Empty Tasks' check. Previously, users needed to know that the error grids could be copied from using the record selectors on the grid and using the Ctrl+C copy command. This button makes that functionality more accessible and allows the user to quickly capture all relevant error information.
- 20.3.7 (12/6/2022)
- Export Status
- Added the Cost Contract Code functionality when exporting status for IPM; was previously only available when the target export format was MPM.
- Export BCR
- The form will now always retain focus and not allow users to switch focus between the form and MS Project.
- Corrected issue where warnings could suppress errors if both were encountered on the same task.
- Now excluding inactive tasks data from the export results.
- Added a new check: Detail tasks of a summary with a BCR # cannot be inactive.
- Navigate Tasks
- Added functionality to store the user's sort preferences. The Predecessors and Successors grids will now retain the user's sort preferences as they navigate to new tasks.
- IPM Settings
- Added a new General Setting to allow users to select a custom location for all IPM Utilities file exports. This allows exported files to be saved to locations other than the same folder as the Project file.
- 20.3.6 (11/3/2022)
- Import Status
- The process now produces a more detailed results report. See the Import Status documentation section for more information.
- Export BCR
- Improved the process that detects logic issues on MWPC tasks to properly accommodate for multiple sub-summaries within the parent MWPC summary.
- 20.3.5 (9/8/2022)
- Export BCR
- Resolved scenario where the 'Package has duplicated Milestone IDs' error could have triggered on non 'MW' or 'MWPC' EVTs.
- 20.3.4 (8/23/2022)
- Export Status and Export BCR
- Inactive tasks will no longer be evaluated while using the Standard edition of Microsoft Project.
- Export BCR
- The logic check identifying tasks missing a Milestone Weight or ID will no longer be performed if the task has an EVT.
- Added a new check to search for duplicate Work Package ID and Milestone ID combinations provided for the children tasks of 'MW' or 'MWPC' summaries.
- Export Status
- Improved the display of errors when encountered during the process.
- 20.3.2 (6/3/2022)
- Inspect Schedule
- Fixed bug that occurred if the user tried to run the utility while Project was in edit mode.
- Other Settings
- Added an option to always display the Navigate Tasks utility window on top of MS Project's window.
- IPM Settings
- Added custom number fields (Number 1-20) as selection for the Change Control setting.
- 20.3.1 (1/28/2022)
- Inspect Schedule
- DECM Check “(06A401a) Critical Path” removed.
- Export IPMDAR
- Fixed bug causing EVMS Acceptance Date to not be saved or exported to the final JSON result file.
- 20.3.0 (11/29/2021)
- Inspect Schedule
- DCMA “High Duration” check updated to limit the denominator of the check to the planning period.
- DECM Check “(06A204b) Dangling Starts or Finishes” now includes the first/last task of the schedule in the denominator.
- New IPM check - Planning Package with Actual Start
- IPM Check “Invalid Performance” renamed to “Invalid CAM % Complete”
- DCMA and DECM Critical Path Test check will no longer fail due to negative slack on inactive tasks
- Import Status
- Improved the duration update process for activities that already have the desired duration being requested
- The results report will no longer show differences on Actual Start/Finish dates if the dates were not changed
- 20.2.9 (10/5/2021)
- General
- The IPM Settings and Other Utility Settings no longer require an active schedule to be launched. This allows for settings creation on new schedules and activating the software without an active schedule loaded.
- Import Status
- Improved results report to display activity values after all the status updates are calculated by MS Project.
- 20.2.8 (9/2/2021)
- Inspect Schedule
- DECM Check “(06A204b) Dangling Starts or Finishes” Updated to v4.0. The check will only flag milestone tasks (those with 0 duration) if they have no predecessors/successors; the task relationship types criteria no longer applies.
- Export Status
- The error list generated after the export is no longer editable by the user.
- Import Status
- Any import issues will now be compiled and reported all at once after the import completes.
- Navigate Tasks
- The window will no longer be focused after new task information is loaded to it.
- MilestonesPro to PNG
- An alternate export method is used to resolve errors users experienced when working with EMF files. Images will be exported directly from Milestones Professional as PNGs instead of as EMFs.
- 20.2.7 (6/22/2021)
- Inspect Schedule
- The DECM Check “(06A204b) Dangling Starts or Finishes” will no longer leave the schedule sorted by Baseline Finish after running
- Export BCR
- Resolved bug causing BCR summary tasks to be evaluated as if they had an Earned Value Technique assigned.
- 20.2.6 (6/2/2021)
- Export IPMDAR
- Tasks with a “PP” (Planning Package) IPM earned value technique now export as not having an earned value technique in the IPMDAR per the submission guidelines.
- Two new Core Field Mapping settings are available: “On Critical Path” and “On Driving Path”. See the Core Field Mappings section for more information.
- Inspect Schedule
- All check results are now cleared before every run.
- 20.2.5 (5/13/2021)
- Export IPMDAR
- Percent values are now export as decimals instead of whole numbers. For example, “15%” was represented as “15” and it is now “0.15”.
- A task's Baseline Work field value will no longer be exported for any core field setting mapped to “(Not Applicable)”.
- The “Use Lookup Description” checkbox in the settings is automatically unchecked and disabled (no matter the previously saved state) if a lookup field is changed back to a normal value field.
- The warning “Task Planning Level is 'PLANNING_PACKAGE' with EVT not equal to 'PP'” is now correctly reported.
- JSON files are no longer be duplicated in the final zipped result when creating multiple exports.
- A new setting is available on the main form to report your schedule's duration data in either “Days” or “Hours”. Previously, the tool only exported durations in “Hours”.
- The error reporting calendars without work shifts assigned now lists each problematic calendar's name.
- IPM Utilities Settings
- The character limit on the Profile name is increased from 10 to 255.
- 20.2.4 (4/7/2021)
- Export BCR
- Added new validation check to ensure all BCR summary Baseline dates match the earliest Baseline Start and latest Baseline Finish of their detail activities.
- Added new validation check to ensure all BCR activities that have an Earned Value Technique value also have a Package assigned.
- Resolved issue causing the “Detail activities of a milestone summary cannot be milestones” error to go undetected in some scenarios
- Import Status
- Added logic to skip freezing the top row of the status import summary if Excel isn't able to.
- Inspect Schedule
- Updated the DCMA and DECM “Critical Path Test” check to warn the user if the test altered their Project Finish date. It is possible for bad network logic to cause the Project Finish date to not be pulled back in time to its original value after the test increases/decreases a task's duration.
- 20.2.2 (2/23/2021)
- Inspect Schedule
- Updated DECM “(06A204b) Dangling Starts or Finishes” to be skipped on schedules without baseline dates.
- Added new IPM check: Inconsistent %C Progress
- Updated DECM check name from 'Zero Duration Planning Packages' to 'Do all PPs have Duration' as specified in DECM version 3.6.1.
- General
- Ended support for MS Project 2007.
- 20.2.0 (1/8/2021)
- Export IPMDAR
- Added an entire new utility to the ribbon to facilitate exporting schedule data for the IPMDAR submission. See the Export IPMDAR section for details on the new feature.
- Inspect Schedule
- Updated the DECM logic to adhere to the specifications mandated in DECM version 3.6.1
- 20.1.3 (8/4/2020)
- Export Status
- Updated documentation to explain which tasks will be ignored by the export process for not meeting certain criteria
- Inspect Schedule
- Updated the 'Invalid Baseline Data' check to ignore tasks with decimals in their duration. This check would previously flag these for not being alphanumeric.
- 20.1.2 (5/7/2020)
- Export BCR
- Fixed minor bug causing the unique id to increment automatically.
- Fixed backwards compatibility issue with other OPDEC MSP Add-In tools.
- 20.1.0 (4/23/2020)
- All Utilities
- Improved user messaging implemented to resolve focus issues found in new versions of Project (2019/365). Any popup announcements or input requests will now be focused upon display.
- Export BCR
- Improved error messaging if the exported BCR file already exists and is open by the user. The file must be closed before creating another with the same name, and the new message will indicate this.
- Any blank task rows inserted into the schedule will be ignored.
- Inspect Schedule
- Minimizing the schedule while the process is running will no longer cause issues.
- MilestonesPro to PNG
- Will no longer fail to detect the Milestones Professional installation.
- Images will be converted to a PNG format in a safer way.
- 20.0.0 (2/7/2020)
- Inspect Schedule
- DECM Check Changes
- Updated to be in accordance with DECM version 3.4
- (06A203a) SF Relationships - This check was removed from the schedule metrics.
- (06A206a) Use of Leads - This check was removed from the schedule metrics.
- (06A204b) Dangling Starts/Finishes - This check is updated to specify “non-LOE” tasks instead of “discrete” tasks. It also defined the contract start/completion tasks are any tasks with the earliest Baseline Start date in the schedule or the latest Baseline Finish date; these tasks will now be ignored.'
- (06A210a) Loe Tasks with Non-LOE Successor - This check is updated to change “discrete” into “non-LOE”. This check will now flag any LOE successors who do not have an “LOE” EVT assigned, even if its EVT field is blank.
- (06A212a) Out of Sequence - This check will now incorporate lead/lags into its calculations due specifically to the DECM documentation update mentioning these as notable contributions towards out of sequence tasks. The check will now identify out of sequence tasks with a Start-to-Finish relationship. The check's percentage threshold changed from less than 1% to 0%.
- (06A506a) Invalid Actual Start/Finish Dates - This check now only examines tasks for invalid actual dates if they have an Actual Start date assigned.
- Project 64-bit Compatibility
- The software will now require 64-bit Project users to activate the software with the universal serial number.